
Today I would like to share with you a plaque with the focal element being an Aall & Create stamp design.

As a substrate I used a left over piece of heavy greyboard that I cut to size using a pair of heavy duty scissors. I measured the size for my plaque according to my focal element - the train scene from the Aall & Create border stamp #76.

I have used some more Aall & Create stamps and one stencil, but let's start with the first step of the tuto!
I primed my greyboard plaque with a thorough layer of black acrylic paint and after that had dried, I loosely scraped some white Gesso on top with a wide palette knife. I made sure some black spots still showed through. (for larger view simply click on the images)

The train scene had been stamped with black archival stamping ink onto some tissue and fussy cut. I used it to mark particular spots of the motive on my plaque, so I knew where to add additional designs without covering up the image.

Then I rummaged my paper bits box and fetched some old book pages, designer paper scraps, dried coffee pads and tea bags, a left over print done with the Aall & Create stencil #28 (at the very right) and some die cut left overs...

Time to collage away! The black and white Aall & Create "stencil print" got cut into strips that I used here and there for additional texture.

Then I toned down the whole background by adding a thin layer of diluted Titanium White DecoArt media fluid acrylic paint. Once that had dried, I did some scribbling with a pencil.

Finally it was time for the tissue stamped image to get glued in place! I used a very thin Decoupage glue so the tissue would not tear while being glued in place (using a very soft wide brush). You can of course also dilute the one you have to make it more liquid-y).
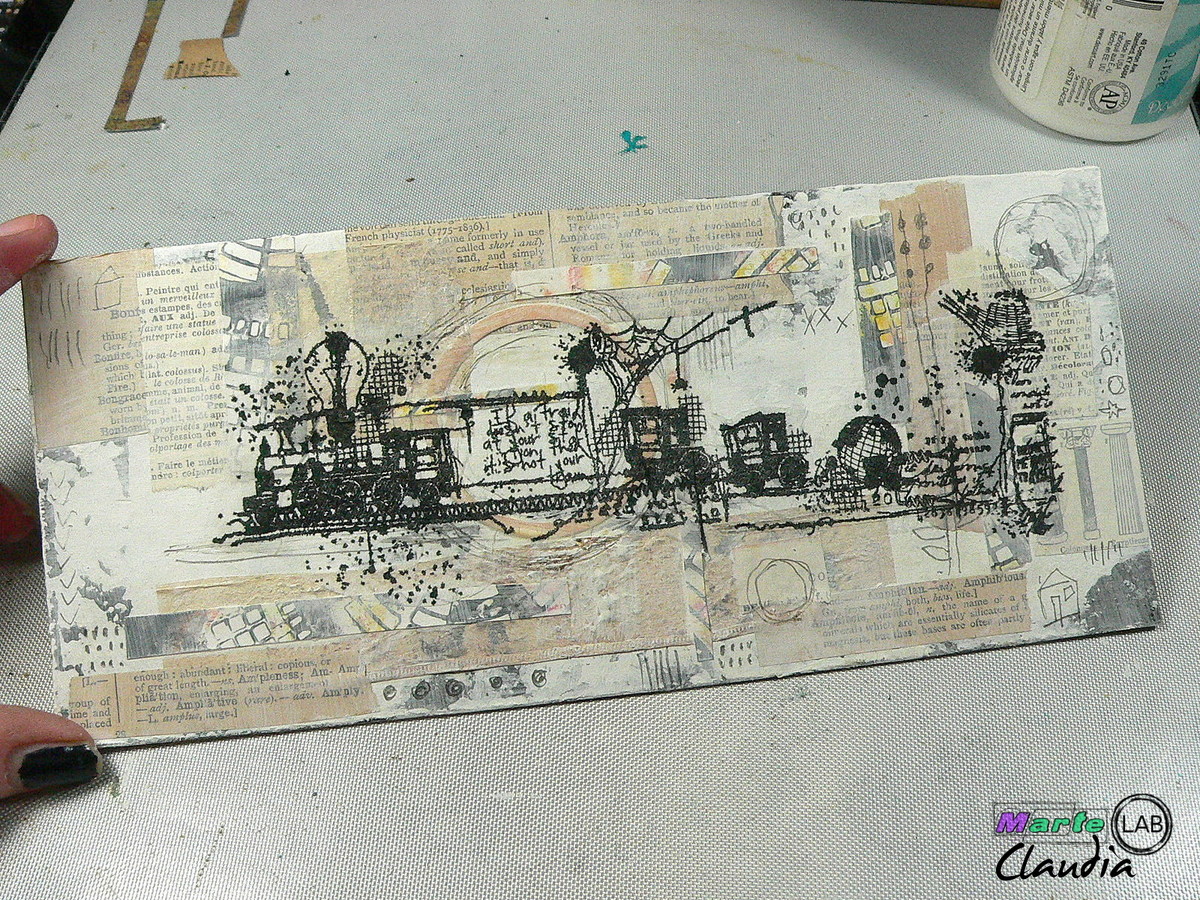
The Aall & Create stamp set #10 (one of my favourites) was perfect for adding more patterns and depth!

I let the black archival stamping ink dry before I went in with DecoArt media fluid acrylic paint "Transparent Yellow Iron Oxide" as a first.

That got followed by DecoArt media fluid acrylics Hansa Yellow Medium, Quinacridone Burnt Orange, Burnt Umber and more Titanium White.

I also added some doodling with a white acrylic paint pen here and there.
The "Take the Scenic Route" Quote Chip finished off the design.

Finally I blended the plaque's edges with black archival stamping ink using a piece of blending foam and I decided to add some hints of gold using gold wax (which I simply applied with my fingertip).

A thin gold and white outline around the plaque's edges helped fuse all the visual elements in the design.

Fatto!

Some close ups:


...and once more the finished plaque.

All you need to create a mixed media plaque like this can be found in the Marte online store of course (if not the exact brand then there is a product from a different manufacturer).
Hugs and happy crafting!
Claudia
xxx

Nessun commento:
Posta un commento