Hi everyone it's Jenny here with a final post for 2020 here at MarteLAB. I'm sharing a tutorial for a set of collage cards created using a fabulous stencil design by Rebekah Meier that's available in the Marte store. Here are the first two cards in the set of six.
It feels like we all need as much love as we can get right now so these cards all feature the hearts that are a part of
Rebekah's stencil design. Here's how they came together, starting with a 'masterboard' background on watercolour paper that includes some watercolour ink patches, white gesso, tea staining and texture paste through the 'lattice' part of Rebekah's stencil.
A mix of
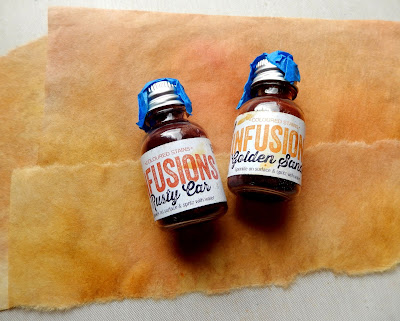
PaperArtsy 'Infusions' diluted with water was spread over teabag paper and dried with a heat tool before being torn into strips.
Below you can see where part of the 'masterboard' was cut into pieces large enough to cover white card blanks and the dyed teabag paper was torn into small strips.
To create the hearts I mixed some texture paste with a combination of
PaperArtsy 'Infusions' storing the mix in a small pot so it could be covered to prevent it from drying out too fast. You'll see where I checked how the colour would change as it dried.
The coloured paste was spread through the two heart shapes on the stencil onto kraft card. Once dry I cut around the paste shapes to remove the excess card. The paste can be heated with a heat tool to speed up the process.
To add more colour to each card I tore strips from tissue which had been painted with PaperArtsy chalk paint. The tissue was added to each background using a soft matte gel medium.
After adding some hand stitching I stamped the dot pattern from
Seth Apter's PaperArtsy stamp set ESA02 onto the area where the hearts would go using black permanent ink. The hearts were then glued in place and each background added to a card blank.
Here are the final four cards in the set made in this way;
I hope you've enjoyed seeing today's cards and the tutorial has given you some ideas for creating your own projects. Thank you so much Marcella and Fabio for giving me the opportunity be a part of the Marte family this year. And to end I wish you all a peaceful, positive and safe 2021.
Jenny (
Pushing The Right Buttons)


