Claudia (from Von Pappe II) here and I am so excited to share my first project as a new MarteLAB design team member with you today!
I was generously given some fabulous AALL & CREATE stamps and stencils to play with and I decided to use some of these together with black and white embossing powder, my favourite acrylic paints and layering techniques to create a set of three small journals in mixed media style.
I love to use the same colours and media on different substrates to create sets. In this case I used heavy black, white and Kraft coloured papers, ...
...three small cheap plain note books I had in my stash and these stamps and stencils from AALL & Create:
They're all designed by Autour de Mwa and are (from left to right): "Scribble it"A4 sized large stamp #58, stamp set #10 and stencil #10.
First I used one of the little note books to find the size for the covers. I simply laid out the open book, added about three Millimetres to each side and marked that with a white pencil on the black paper.
Then I used my guillotine shears to cut the cover to size. Afterwards I used that cover as a template to cut two more covers to size - one from white, the other from kraft cardstock.
Using a bone folder I folded the covers in half.
I started with my base layer and decided to use the large Scribble it stamp #58 and black archival stamping ink. As this stamp is an A4 size, I used it "the other way round". I fixed the stamp with its acetate backing to my craft mat using sticky tape and inked only those areas I wanted to get stamped on my covers.
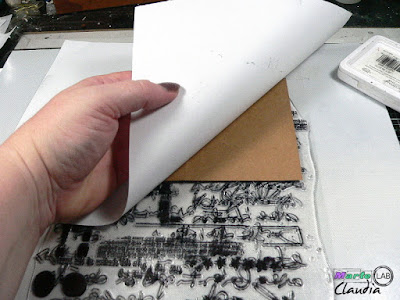
Then I placed one cover at a time face down on the inked stamp, covered that with a sheet of printer paper...
...and rubbed across the whole area firmly. The printer paper made sure I didn't get any ink on my hand while rubbing the ink from the stamp onto the covers.
The black cover had to be prepped first so the black stamping would be visible. I used a palette knife and DecoArt media white Gesso and loosely scraped that across the front and back covers. I used a heat tool to speed up the drying time of the Gesso.
Then my black cover was ready to get stamped with gorgeous scribbles too:
The next layer I added was done using the #10 stencil and a mix of some drops of DecoArt media fluid acrylics Primary Yellow and Pyrrole Red with a bit of media white Tinting Base. I used my palette knife to mix the paints and medium on my palette and then took a cosmetic sponge to apply the paint through the stencil onto the covers.
The result looked quite pleasing at that stage...but that was only the start!
Next I went in with a bit of Pyrrole Red media fluid acrylic paint that I scraped onto the covers using the very tip of my palette knife.
So far the kraft, black and white covers were visually connected by the pink circles from the stencilling and the red scraped on paint, but I wanted all three to look even more as a set. So I needed a colour that would repeat the brown from the kraft cover on the two other covers. I decided to create my own mix of brown by adding a few drops of Raw Umber media fluid acrylic paint and about two drops of Primary Yellow to about a coffee spoon of white Tinting Base.
That mix was loosely scraped onto the white and black covers.
To repeat the white from the white cover on the kraft cover, I used plain white Tinting Base and scraped that on with the tip of the palette knife too.
And last but not least I also added black DecoArt media Gesso to the kraft and white covers. Now I had black, white and brown on all three covers!
For additional texture I used the numbers stamp from stamp set #10 and black embossing powder on all three front covers. I love how the glossy embossed areas contrast the matte black Gesso!
Time for some doodling! I outlined all the pink circle shapes with a black fine tip marker and also drew a thin border with it around the covers.
Then I decided to also do some heat embossing using the circles stamp from the #10 stamp set and white embossing powder! That definitely made a huge impact!
Finally I added word stickers and shaded these in by using my beloved Stabilo All aquarellable black pencil and a wet detail brush to smudge the lines I had drawn around the stickers.
The covers were done! The only thing missing was the binding. To do that I marked points for the two holes each on the covers' insides...
...and used my pokey tool and a thick piece of foam to create these.
Then I cut three pieces of rough cord - each three times the height of the covers long - and used an ordinary threading tool to get the cords' ends trough the small holes to the covers' insides. Then I simply placed the open note books inside the covers and tied a double knot in their very centres.
Done!
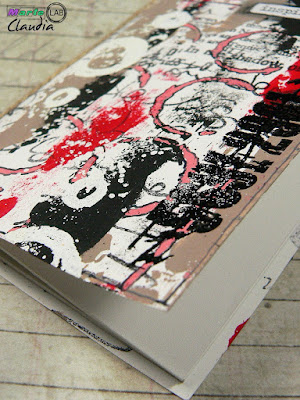
Some detail shots:
...and once more the finished set of journals:

I hope you like it! Everything you need to create this set of mixed media mini journals can be found in the Marte store. You can use bought cheap note books of any size as the covers can be easily customised to fit - all you have to do is add three to four Millimetres around all four edges of the opened and laid out flat note book.
Thanks so much for stopping by today!
Hugs and happy crafting!
Claudia
xxx


